Step 1 : Uploading firmware binary to Azure Storage
You can upload ReButton firmware binary to Azure Storage wiith Azure CLI tool.
1.1 : Install Azure CLI
Please refer to Azure CLI install instruction here.
And Using the Azure CLI with Azure Storage page is helpful to process things on this instruction.
1.2 : Create a new storage account
To use Azure Storage, you need a storage account. You can create a new Azure Storage account after you’ve configured your computer to connect to your subscription.
az storage account create \
    --location <location> \
    --name <account_name> \
    --resource-group <resource_group> \
    --sku <account_sku>
e.g.
az storage account create --location japaneast \
--name seeedkk --resource-group ReButton --sku Standard_GRS
You can use same resource group to IoT Hub.
1.3: Set default Azure storage account
First, display your storage account keys by using following account.
az storage account keys list \
    --account-name <account_name> \
    --resource-group <resource_group> \
    --output table
e.g.
az storage account keys list --account-name seeedkk \
--resource-group ReButton
Now that you have the key, you can define it and the account name as environment variables:
export AZURE_STORAGE_ACCOUNT=<account_name>
export AZURE_STORAGE_KEY=<key>
1.4 Create a container
Every blob in Azure storage must be in a container. You can create a container by using following command.
az storage container create --name <container_name> \
--public-access container
1.5 Upload a blob to a container
And you can upload firmware binary to Azure storage with following command.
az storage blob upload \
    --file <local_file_path> \
    --container-name <container_name> \
    --name <blob_name>
e.g.
az storage blob upload -f ReButtonApp.1.0.bin \
--container-name rebuttonfirm --name ReButtonApp.1.0.bin
1.6: Grab the URL
You can find the URL of uploaded blob on Azure Portal.
On the portal, please find Storage accounts in All services and then choose storage accounts you used to upload, and choose Blobs.
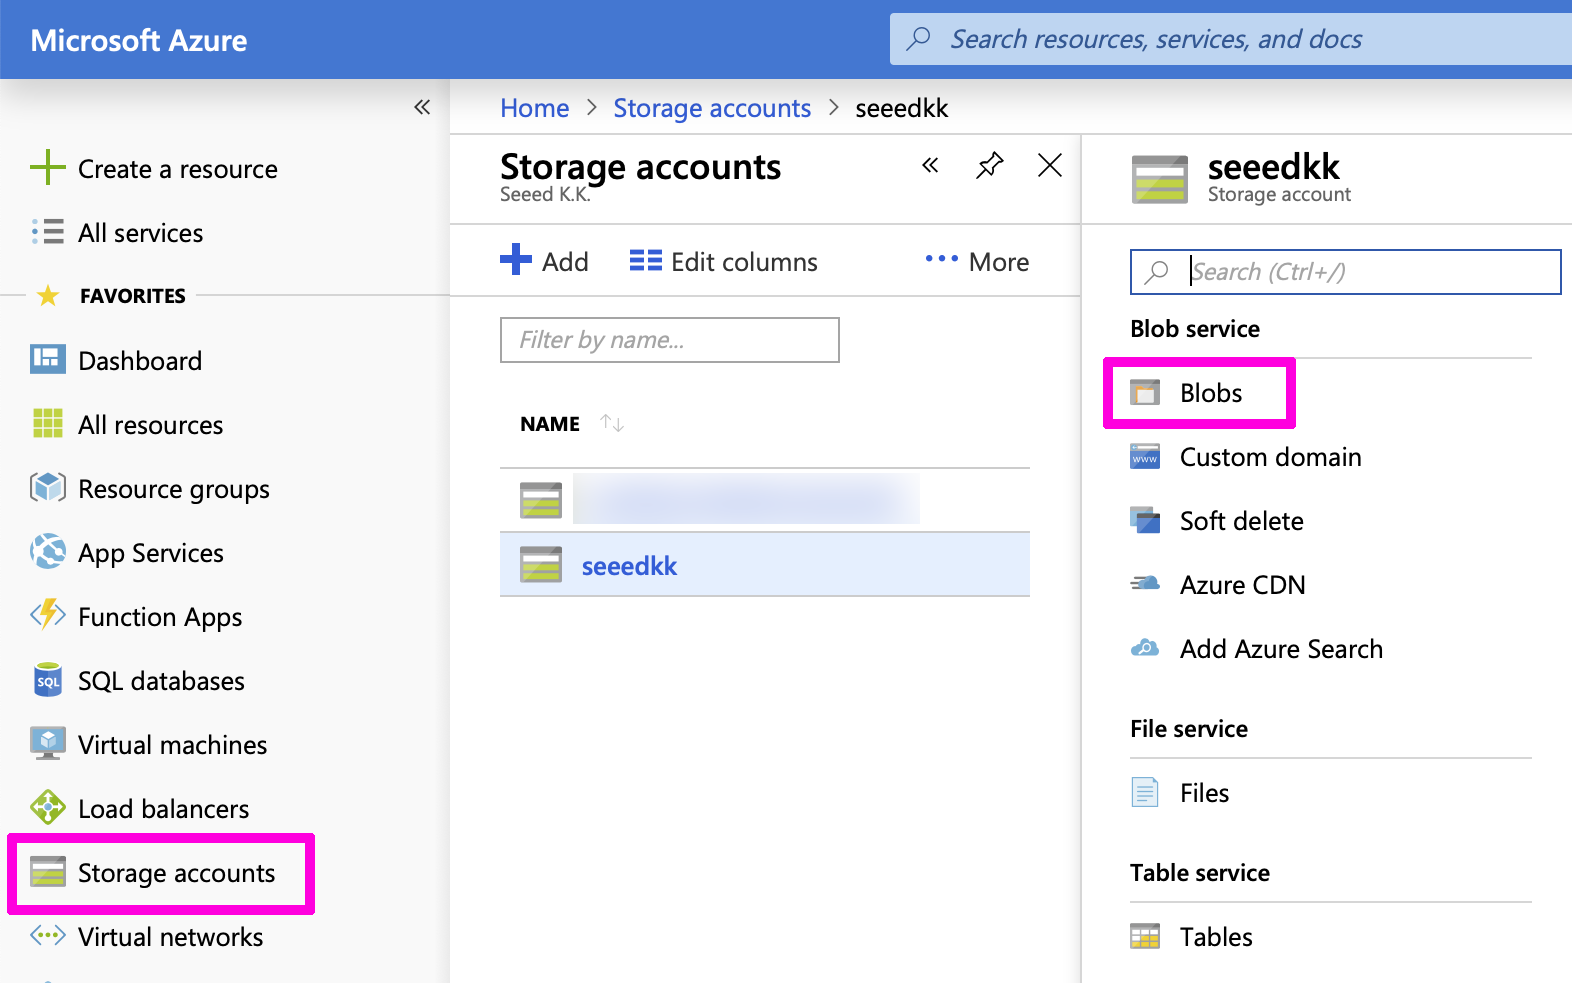
In the container you have just used, you can find uploaded file(blob). By clicking the filename, you can refer the URL.
Step 2: Calculate CRC
CRC can calclulate with generatecrc command we are providing in this repository.
example:
$ cd generatecrc
$ ./generatecrc ../ReButtonApp.1.0.bin
========== ReButton Firmware Information ==========

Package path: ../ReButtonApp.1.0.bin
Package CRC: 0xbc3b
Package size: 641924

===================================================
Step 3: OTA process
OTA consume power. Please use fresh battery, not to interrupt OTA process.
- Enter ReButton to AP mode by press hold the button until RGB LED turns into White.
(reminder: connect to the AP
AZB-xxxxxxxxxxxxand the URL of the page ishttp://192.168.0.1) - Browse to ReButton - Home page then click
Firmware Update. - Enter following information.
Package URI- got on Step 1.6Package CRC- got on Step 2.Package Size- got on Step 2.
- While holding (physical) button of ReButton, click
Update. - Hold button until RGB LED starts blinking. ReButton is downloading the firmware image, checking CRC, and flashing new image. This will take about 30 seconds.
- Release button when RGB LED turns into White. So that you are entering AP mode with new firmware.
- Please set-up ReButton Wi-Fi connection and Azure connection settings on this AP mode.